Super Easy Quilt Making.
‘Super easy quilt making’ is probably the wrong title for this post.
It should actually read, ‘ Make it up as you go ‘.
This morning I was doing my favourite Sunday morning activity. That would be drinking coffee in my p.j’s whilst browsing Pinterest – when I came across this:

I love fabric, I love making things but i’m not very precise with them. My seams don’t line up and my sewing is only straight-ish. So I clicked into the post, read it all (it is a really good read) and decided that I would make a start on a quilt.
At the knit & Stitch show 2015 (yes, it was that long ago) I got some gorgeous Tilda fabric from The Crafty Fox stand.

Then last year I bought some pale pink velvet to make a backing for said fabric.

The tutorial said that she had used fabric of all sizes. Since I had bought fat quarters I thought i’d cut them a little more evenly to get the best layout from them.
The ‘How To’ bit…
First of all I ironed them (being folded for a year and a half really sets those creases!) Then marked them every 4 1/2 inches and drew a pencil line.

I do have a rotary cutter but I just can’t get along with it, so I used scissors.

Once I had cut up all five fat quarters into the 4 1/2″ strips, I cut those strips into random sized pieces. I cut some lengths into two sections and some into four or five. There was some pretty fabric with buttons on it in my stash so I added a little of that as well as a few pieces of the darker green stripe (top left in the picture).
I had bought a full metre of the green stripe so I thought I’d use that for the binding. It’s a bit of a contrast to the main colours but by adding a few little bits into the quilt top it will all blend in. Remember the ‘make it up as you go ‘ theme? yep, that’s where the binding that doesn’t match came from.
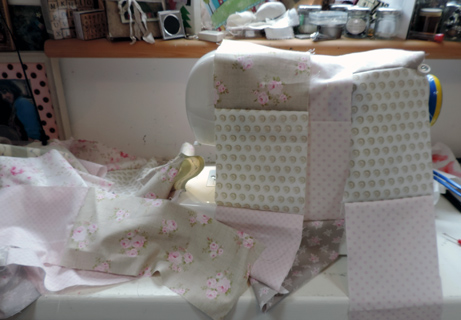
To make the top I just sewed pieces from each pile together in a long strip. There was no pattern to it, just randomly choosing a piece and sewing to the last. It didn’t take very long – in no time at all I had this:

That’s a long strip of fabric!
Five fat quarters cut into 4 1/2 inch strips (with a little of the two other fabrics thrown in) came to an amazing 40 foot long strip!
Next I decided how wide I wanted my quilt to be (you can see how well I thought this out before I started can’t you?) which was 36 inches. By the time I had cut up the whole thing I had thirteen strips. The last one was slightly short so I just added an extra piece of button fabric.

You can see how the order you sew them together in doesn’t really matter. The different sized blocks make it less precise and you can move the strips around until you like the layout. Of course, then it all has to sewn together, but that is really easy especially if you’re not too precious about sewing straight. I do try, I line up my edges and keep the sewing machine foot on the edge but the straight line just alludes me. Real quilters are amazing, they make it look so easy!

(I should have ironed this before I took the photo……)
It took two and a half hours to go from Pinterest to having the quilt top sewn together, much faster then piecing squares! I have to get wadding tomorrow (if you live in a place where there is a fabric shop nearby that is open seven days a week then you are a very lucky person!) and then decide how to quilt the layers together. I would love to try some free motion quilting but i’m not brave enough yet.
Tune in next week to see if I’ve made any progress…… hopefully I will have a finished quilt to show off!
Felicia xx


