0
Browsing Tag

fabric

In Blogging/ Craft

How to sew a Goose.


How to sew a goose.

We’ll get to the goose soon….

Once upon a time I started a blog. This blog was called Scrapzville and I had it for many years.

Looking back at the first year or two I see that I wrote long, rambling posts, as if you (the reader) and I were sitting at the kitchen table having  a chat. Not only did I post long rambling blogs, I posted often. So what changed?

Well, two things. Firstly, I started to get ‘followers’. People, some of whom I knew and some I didn’t, started to read it, and I got an unmerciful dose of the ‘What will they think of me?’ bug. I got shy and bothered and started to write what I thought it would be OK for people to read, instead of what I wanted to write. So, I wrote less and less and eventually I decided on a big change in the hope of a fresh start.

How not to sew a goose.

The second thing, after I changed from Blogger to WordPress was the bloody SEO scores! I like long sentences, the SEO does not. There are these little spots of colour at the top of the page, it starts off red, orange is ‘needs improvement’ and green is good. I’m at the mercy of these spots, shortening sentences all over the place for the elusive green!

(I bet you’re wondering about the goose?)


All this to say that I want to go back to rambling. I’ve been gone for so long that I doubt anyone will read this, I will though. Sometimes I go back and read really old posts, it’s like an online diary, it’s cosy, I like it.

So, if you are still here, well done. Make some tea or coffee and we’ll get to the goose!


Last weekend I took a notion to sew something, and for some reason I decided on a goose. Now, I don’t have a pattern for it so I looked on Pinterest (where else?!) but none of them were the right shape. Apparently there is a quilting pattern called ‘Silly Goose’ so that came up a lot, but very few soft toy types.

Eventually, I drew out my own. This is a very ‘make it up as you go’ kind of thing, so this could be a very odd looking creature.

How to sew a goose

I cut out the pieces ( I could’ve ironed the fabric first…) and started sewing. How to sew a goose


I was doing so well until I turned the neck the right side out. This is what comes from making it up as you go, I forgot to turn the beak the right way before I sewed it in. This meant battling that long skinny neck with a knitting needle to turn it seam side out, unpicking the beak and starting again.

(Just so you know, the little spot has gone orange, it didn’t like that last sentence!)

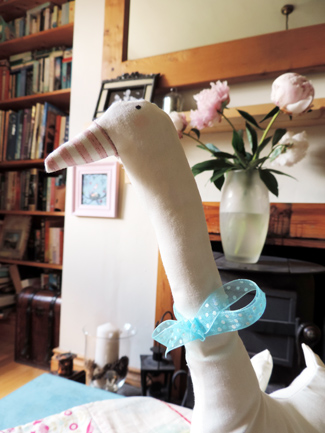
Eventually I had a shape that looked fairly good. I used toy stuffing, sewed her up added a bow and Ta da… a Goose!!


How to sew a goose.

Now, the only thing that I would change is the position of the legs. They are quite far forward which makes her look a bit like the Loch Ness monster, but for a first attempt at pattern making I think it’s pretty good.
How to sew a goose

So there you have it. There is a goose, loose about this hoose!

It’s a lovely day here, I hope it’s nice where you are too.

Thank you for stopping by,

F xx
In Blogging/ Craft

Super Easy Quilt Making.

Super Easy Quilt Making.

‘Super easy quilt making’ is probably the wrong title for this post.

It should actually read, ‘ Make it up as you go ‘.

This morning I was doing my favourite Sunday morning activity. That would be drinking coffee in my p.j’s whilst browsing Pinterest – when I came across this:

Super Easy Quilt Making

(Credit)

I love fabric, I love making things but i’m not very precise with them. My seams don’t line up and my sewing is only straight-ish. So I clicked into the post, read it all (it is a really good read) and decided that I would make a start on a quilt.

At the knit & Stitch show 2015 (yes, it was that long ago) I got some gorgeous Tilda fabric from The Crafty Fox stand.

Super Easy quilt making

Then last year I bought some pale pink velvet to make a backing for said fabric.

quilt5

The tutorial said that she had used fabric of all sizes. Since I had bought fat quarters I thought i’d cut them a little more evenly to get the best layout from them.

The ‘How To’ bit…

First of all I ironed them (being folded for a year and a half really sets those creases!) Then marked them every 4 1/2 inches and drew a pencil line.

Super easy quilt making

I do have a rotary cutter but I just can’t get along with it, so I used scissors.

Super easy quilt making

Once I had cut up all five fat quarters into the 4 1/2″ strips, I cut those strips into random sized pieces. I cut some lengths into two sections and some into four or five. There was some pretty fabric with buttons on it in my stash so I added a little of that as well as a few pieces of the darker green stripe (top left in the picture).

I had bought a full metre of the green stripe so I thought I’d use that for the binding. It’s a bit of a contrast to the main colours but by adding a few little bits into the quilt top it will all blend in. Remember the ‘make it up as you go ‘ theme? yep, that’s where the binding that doesn’t match came from.

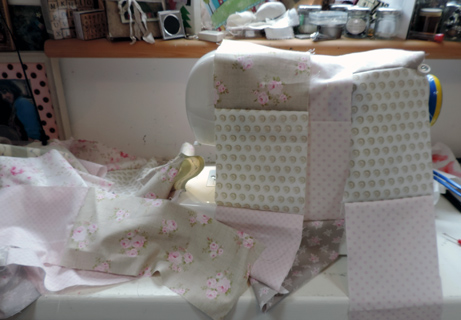
To make the top I just sewed pieces from each pile together in a long strip. There was no pattern to it, just randomly choosing a piece and sewing to the last. It didn’t take very long  – in no time at all I had this:

Super easy quilt making

That’s a long strip of fabric!

Five fat quarters cut into 4 1/2 inch strips (with a little of the two other fabrics thrown in) came to an amazing 40 foot long strip!

Next I decided how wide I wanted my quilt to be (you can see how well I thought this out before I started can’t you?) which was 36 inches. By the time I had cut up the whole thing I had thirteen strips. The last one was slightly short so I just added an extra piece of button fabric.

Super easy quilt making

You can see how the order you sew them together in doesn’t really matter. The different sized blocks make it less precise and you can move the strips around until you like the layout. Of course, then it all has to sewn together, but that is really easy especially if you’re not too precious about sewing straight.  I do try, I line up my edges and keep the sewing machine foot on the edge but the straight line just alludes me. Real quilters are amazing, they make it look so easy!

Super easy quilt making

(I should have ironed this before I took the photo……)

It took two and a half hours to go from Pinterest to having the quilt top sewn together, much faster then piecing squares! I have to get wadding tomorrow (if you live in a place where there is a fabric shop nearby that is open seven days a week then you are a very lucky person!) and then decide how to quilt the layers together. I would love to try some free motion quilting but i’m not brave enough yet.

Tune in next week to see if I’ve made any progress…… hopefully I will have a finished quilt to show off!

Felicia xx


In Craft

Tweed Tote Bag.

Tweed Tote Bag.

The Knitting and Stitching show was on in Dublin last week. There is no place like it for stocking up on crafting materials, especially the ones you didn’t know you needed!

I should take a list, write down all the projects i’d like to do and what I will need to make them. That would be sensible. However, by the time it comes around I’m a bit lacking in enthusiasm. The inspiration of last years show has worn off. What happens then is I go in thinking, “well, I need glue…. and maybe some Bondaweb”. But then you get freshly inspired by all of the products.

All the things you could make!

That leads from a hundred project ideas to getting totally overwhelmed, and being back to just getting glue.

So what did I buy?

This year I came home with fabric – lots of fabric! Some of it was for my Mum, but the rest was all mine.

Tweed Tote Bag

Usually, I get lots of cotton fat quarters for quilting. I’m not very good at quilting, my seams never meet neatly. But they’re fun to make. Last year I got some gorgeous Tilda fabrics from The Crafty Fox stand. I have yet to cut into them so I’m on a self imposed ban – no more until I use what I have.

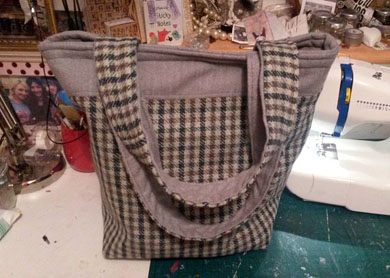
This year I was tempted by this grey heavy flannel and a tweed. What will I make with it?, I asked myself, A tote bag? Why not? Experience has taught me that if I don’t make it in the week after the show it won’t get made (which explains the quilt) so believe it or not, here it is!

Tweed Tote Bag.

(Finished bag size is 18″ x 15″ x 7″)

There are endless Youtube tutorials on how to do this, I used this one (without the patchwork bits obviously). My measurements were different to hers, but the process is the same.

If you are going to make this then here is a word of advice. Make your handles the same fabric on both sides. I wanted grey on the inside and tweed facing out. Seems simple enough doesn’t it?

It’s not!

When you make it the whole thing is inside out. For the life of me I couldn’t work out which way round the lay the handles. As you sew over the handles to secure them in place you’re sewing six layers of fabric. Only then, after turning the whole thing through a tiny gap in the seam did I discover my mistake.

No problem, I thought. Just stuff it all back through the gap in the seam, unpick all the sewing and re position the handles. I turned them around and started to re sew the top and broke not one but two sewing machine needles!

There may have been some unpolite expletives muttered……

But I do have a gorgeous bag to show for it. It is fully lined with the flannel which makes it cosy enough for Toby to sleep in. He looks most indignant when I take him out.

If and when I get the quilt finished i’ll post it here. A lovely pale pink velvet came home with me for the backing. I have all I need to make it now, so there is really no excuse……

Have a lovely Halloween weekend,

Felicia xx